Deploying Wagtail to AWS with AppPack
- Written by
 Peter Baumgartner
 - Published
Wagtail is one of the most popular content management systems in the Python ecosystem. It is built on top of the Django Web Framework and follows a very standard Django deployment process.
It provides a simple local setup which we can build on to take it from development-ready to production-ready and scalable on AWS.
This post follows the Django deployment how-to with Wagtail version 3. The code lives in ipmb/wagtail-demo on GitHub.
Local Set Up
We'll assume your local machine is prepped to run Python projects. To get started we can follow their install instructions:
pip install wagtail
wagtail start demo
cd demo
This generates the boilerplate code and gives you what you need to start working locally. You can follow the rest of their instructions to initialize a database and run the site locally, but we'll skip ahead to the steps we need to make it production-ready.
Serving static files
Django doesn't handle serving static assets beyond its local development server. No problem, whitenoise to the rescue.
We need to:
- Add
"whitenoise.middleware.WhiteNoiseMiddleware"to theMIDDLEWAREsettings - Update the
STATICFILES_STORAGEto"whitenoise.storage.CompressedManifestStaticFilesStorage" - Add
whitenoiseto therequirements.txt
That looks like this:
diff --git a/demo/settings/base.py b/demo/settings/base.py
index 391b8b9..a226ea3 100644
--- a/demo/settings/base.py
+++ b/demo/settings/base.py
@@ -57,2 +57,3 @@ MIDDLEWARE = [
     "django.middleware.security.SecurityMiddleware",
+    "whitenoise.middleware.WhiteNoiseMiddleware",
     "wagtail.contrib.redirects.middleware.RedirectMiddleware",
@@ -142,3 +143,3 @@ STATICFILES_DIRS = [
 # See https://docs.djangoproject.com/en/4.0/ref/contrib/staticfiles/#manifeststaticfilesstorage
-STATICFILES_STORAGE = "django.contrib.staticfiles.storage.ManifestStaticFilesStorage"
+STATICFILES_STORAGE = "whitenoise.storage.CompressedManifestStaticFilesStorage"

diff --git a/requirements.txt b/requirements.txt
index 4eee665..ae1216e 100644
--- a/requirements.txt
+++ b/requirements.txt
@@ -2 +2,2 @@ Django>=4.0,<4.1
 wagtail>=3.0,<3.1
+whitenoise
Connecting to the database
The default set up uses a local SQLite database. For production, we'll connect to a Postgres server running on AWS. AppPack will provide the app an environment variable named DATABASE_URL with the database connection details. We can plug-in dj-database-url to convert this to the format Django expects and install the Postgres database adapter, psycopg2.
We need to:
- Modify the settings to use
dj_database_url.config - Add
psycopg2anddj-database-urltorequirements.txt
diff --git a/demo/settings/base.py b/demo/settings/base.py
index a226ea3..5a79307 100644
--- a/demo/settings/base.py
+++ b/demo/settings/base.py
@@ -15,2 +15,4 @@ import os

+import dj_database_url
+
 PROJECT_DIR = os.path.dirname(os.path.dirname(os.path.abspath(__file__)))
@@ -88,6 +90,5 @@ WSGI_APPLICATION = "demo.wsgi.application"
 DATABASES = {
-    "default": {
-        "ENGINE": "django.db.backends.sqlite3",
-        "NAME": os.path.join(BASE_DIR, "db.sqlite3"),
-    }
+    "default": dj_database_url.config(
+        conn_max_age=600, default="sqlite:///{}".format(os.path.join(BASE_DIR, "db.sqlite3"))
+    )
 }
diff --git a/requirements.txt b/requirements.txt
index ae1216e..f3439f7 100644
--- a/requirements.txt
+++ b/requirements.txt
@@ -2,2 +2,4 @@ Django>=4.0,<4.1
 wagtail>=3.0,<3.1
+dj-database-url
+psycopg2
 whitenoise
Adding a healthcheck endpoint
To determine when a container is ready to start serving traffic, we need a URL which always responds with a 200 status code when the site is up. Django's ALLOWED_HOSTS setting can complicate this a little because the healthcheck requests from AWS don't include a host header. The django-alive package provides everything we need to handle this:
- Add
"django_alive.middleware.healthcheck_bypass_host_check"to theMIDDLEWARE - Add
path("-/", include("django_alive.urls"))to theurlpatterns - Add
django-alivetorequirements.txt
With this in place, /-/alive/ will always respond with a 200 status code when the application is able to startup successfully.
diff --git a/demo/settings/base.py b/demo/settings/base.py
index 5a79307..d94e08b 100644
--- a/demo/settings/base.py
+++ b/demo/settings/base.py
@@ -52,2 +52,3 @@ INSTALLED_APPS = [
 MIDDLEWARE = [
+    "django_alive.middleware.healthcheck_bypass_host_check",
     "django.contrib.sessions.middleware.SessionMiddleware",
diff --git a/demo/urls.py b/demo/urls.py
index c2e8a0c..331811a 100644
--- a/demo/urls.py
+++ b/demo/urls.py
@@ -11,2 +11,3 @@ from search import views as search_views
 urlpatterns = [
+    path("-/", include("django_alive.urls")),
     path("django-admin/", admin.site.urls),
diff --git a/requirements.txt b/requirements.txt
index f3439f7..334a5b3 100644
--- a/requirements.txt
+++ b/requirements.txt
@@ -5 +5,2 @@ psycopg2
 whitenoise
+django-alive
Using a production web server
Django does not ship with a production-ready web server. Let's add that and tell AppPack how to start it. We'll use gunicorn to do that.
- Create a
Procfileand define awebprocess to startgunicorn - Add
gunicorntorequirements.txt
diff --git a/Procfile b/Procfile
new file mode 100644
index 0000000..2678b8f
--- /dev/null
+++ b/Procfile
@@ -0,0 +1,2 @@
+web: gunicorn --access-logfile=- --bind=0.0.0.0:$PORT --forwarded-allow-ips='*' demo.wsgi:application
+
diff --git a/requirements.txt b/requirements.txt
index 334a5b3..6806644 100644
--- a/requirements.txt
+++ b/requirements.txt
@@ -4,2 +4,3 @@ dj-database-url
 psycopg2
+gunicorn
 whitenoise
Running database migrations on deploy
We want to make sure any changes to the database schema are applied when the code is updated. There is a special service named release which can be used to run a one-off task after a successful build and before the site is updated. That is added to the Procfile like this:
diff --git a/Procfile b/Procfile
index 2678b8f..dca8932 100644
--- a/Procfile
+++ b/Procfile
@@ -1,2 +1,2 @@
 web: gunicorn --access-logfile=- --bind=0.0.0.0:$PORT --forwarded-allow-ips='*' demo.wsgi:application
-
+release: python manage.py migrate --noinput
Updating production settings
AppPack will pass config variables to the application as environment variables. We need to update our production settings to read those values from the environment:
diff --git a/demo/settings/production.py b/demo/settings/production.py
index 9ca4ed7..8042904 100644
--- a/demo/settings/production.py
+++ b/demo/settings/production.py
@@ -1 +1,3 @@
+import os
+
 from .base import *
@@ -3,2 +5,5 @@ from .base import *
 DEBUG = False
+SECRET_KEY = os.environ["SECRET_KEY"]
+
+ALLOWED_HOSTS = os.environ.get("ALLOWED_HOSTS", "*").split(",")
Storing file uploads in S3
AppPack deploys apps as containers to ECS, so the filesystem is ephemeral. Any non-temporary files generated by the application need to get stored on S3. AppPack supports both private buckets (which require generating a signed URL for file access) and public buckets (where files are directly accessible on the internet by default). For this application, we're going to assume that all uploads are public and use the public S3 bucket add-on. To do that, we need to:
- Update the settings to use and configure
django-storagesif the AppPack add-on is present - Add
django-storages[boto3]torequirements.txt
Note: AWS credentials will be available to the app automatically -- no need to manually define an access/secret key.
diff --git a/demo/settings/base.py b/demo/settings/base.py
index d94e08b..079adce 100644
--- a/demo/settings/base.py
+++ b/demo/settings/base.py
@@ -150,4 +150,12 @@ STATIC_URL = "/static/"

-MEDIA_ROOT = os.path.join(BASE_DIR, "media")
-MEDIA_URL = "/media/"
+if "PUBLIC_S3_BUCKET_NAME" in os.environ:
+    DEFAULT_FILE_STORAGE = "storages.backends.s3boto3.S3Boto3Storage"
+    AWS_STORAGE_BUCKET_NAME = os.environ["PUBLIC_S3_BUCKET_NAME"]
+    AWS_LOCATION = os.environ.get("PUBLIC_S3_BUCKET_PREFIX", "")
+    AWS_DEFAULT_ACL = "public-read"
+    AWS_QUERYSTRING_AUTH = False
+    AWS_S3_FILE_OVERWRITE = False
+else:
+    MEDIA_ROOT = os.path.join(BASE_DIR, "media")
+    MEDIA_URL = "/media/"

diff --git a/requirements.txt b/requirements.txt
index 6806644..1504c61 100644
--- a/requirements.txt
+++ b/requirements.txt
@@ -7 +7,2 @@ whitenoise
 django-alive
+django-storages[boto3]
Bonus: Run tests in the CI pipeline
With AppPack, you will get a full production CI pipeline out-of-the-box. All we need to do is tell it how to run our tests. AppPack supports a subset of Heroku's app.json file which can be used to define the command to run your tests.
diff --git a/app.json b/app.json
new file mode 100644
index 0000000..aa19a15
--- /dev/null
+++ b/app.json
@@ -0,0 +1,12 @@
+{
+  "environments": {
+    "test": {
+      "env": {
+        "SECRET_KEY": "not_secret"
+      },
+      "scripts": {
+        "test": "python manage.py test --noinput"
+      }
+    }
+  }
+}
Ready to deploy to AWS?
AppPack is the easiest way to deploy your apps to AWS.

AppPack deployment
Prior to creating your application, you'll need to complete the Initial Setup tutorial and create a Postgres database in your cluster.
Here's what the entire app creation process looks like from the terminal (sped up for brevity). Continue reading below for additional details:
To create the application, we'll run:
apppack create app wagtailBe sure to:
- Set the healthcheck endpoint to
/-/alive/ - Enable the database add-on
- Enable the public S3 bucket add-on
Once the app is created, we'll set a couple of config variables the app is expecting:
apppack -a wagtail config set DJANGO_SETTINGS_MODULE=demo.settings.production
apppack -a wagtail config set SECRET_KEY=your-secret-key-here
Then we can kick off the first build (future builds will happen automatically on pushes to the repo):
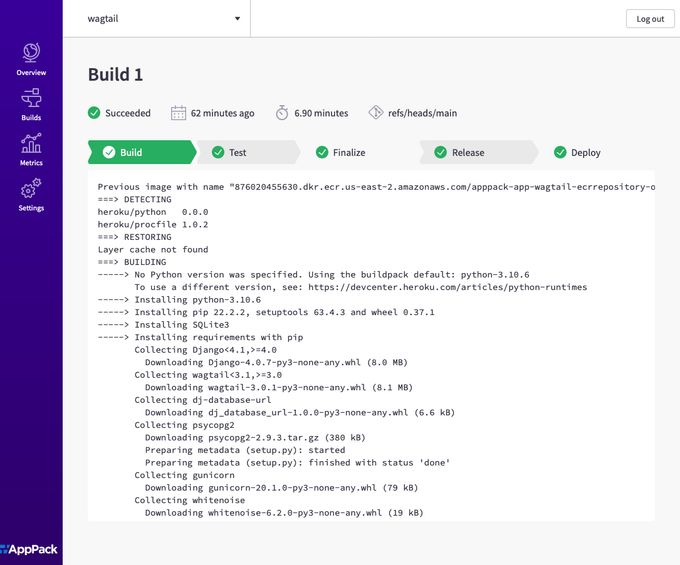
apppack -a wagtail build start --watchYou can also view your build in the web interface:
Next, we can open a remote shell and create an admin account for wagtail:
apppack -a wagtail shellIn the remote session, we'll run:
heroku@ip-10-100-1-28:/workspace$ python manage.py createsuperuser --username pete
Email address: pete@apppack.io
Password:
Password (again):
Superuser created successfully.
Finally, we're ready to start working with our app. To open it in your default browser, run:
apppack -a wagtail openAnd there you have it. Your Wagtail site is live. With AppPack, there are no servers to manage or maintain. Everything runs in your AWS account using AWS-native managed services.